I’ve made no secret of my dissatisfaction with the system requirements for Windows 11. That doesn’t really matter because I’ll teach you how to load it on pretty much any device you want.
Microsoft merely wishes to ensure that you have the most secure machine available. In comparison to prior versions of Windows, Windows 11 has some fairly ridiculous hardware requirements: an 8th generation Intel processor or above, a TPM chip, and UEFI bios with a GPT partition.
This is so you can enable secure boot, but Windows 11 doesn’t actually require you to switch on secure boot; it only needs the PC to be able to do so. When Windows 10 is no longer supported, I believe Microsoft will ease these system requirements, but in the meantime, if you have an older system and wish to run Windows 11, I’ll teach you how today.
The Unsupported PC

For quite some time, I’ve been attempting to install Windows 11 on an unsupported PC. This system is an 11-year old HP Pavilion p7-1027c Desktop PC – Intel Core i3-2100 3.10GHz, 8GB DDR3, 750GB HDD, DVDRW, Windows 10 Pro (64-Bit). And that’s what we’ll use for this tutorial because it’s the biggest device I could find to put Windows 11 on.
When I previously tried to upgrade this PC, I experienced issues. First and foremost, I was unable to upgrade it. I was unable to update to Windows 11 from its existing operating system in order to test it. The other issue was that a lot of functions in Windows Security didn’t work, Windows Terminal didn’t work, and a lot of other things were just buggy, and it didn’t seem right while I was using it.
However, I’ve discovered a way to run Windows 11 on this machine and not just run it, but run it very well, and I’m going to show you how to do it today.
Device Specifications

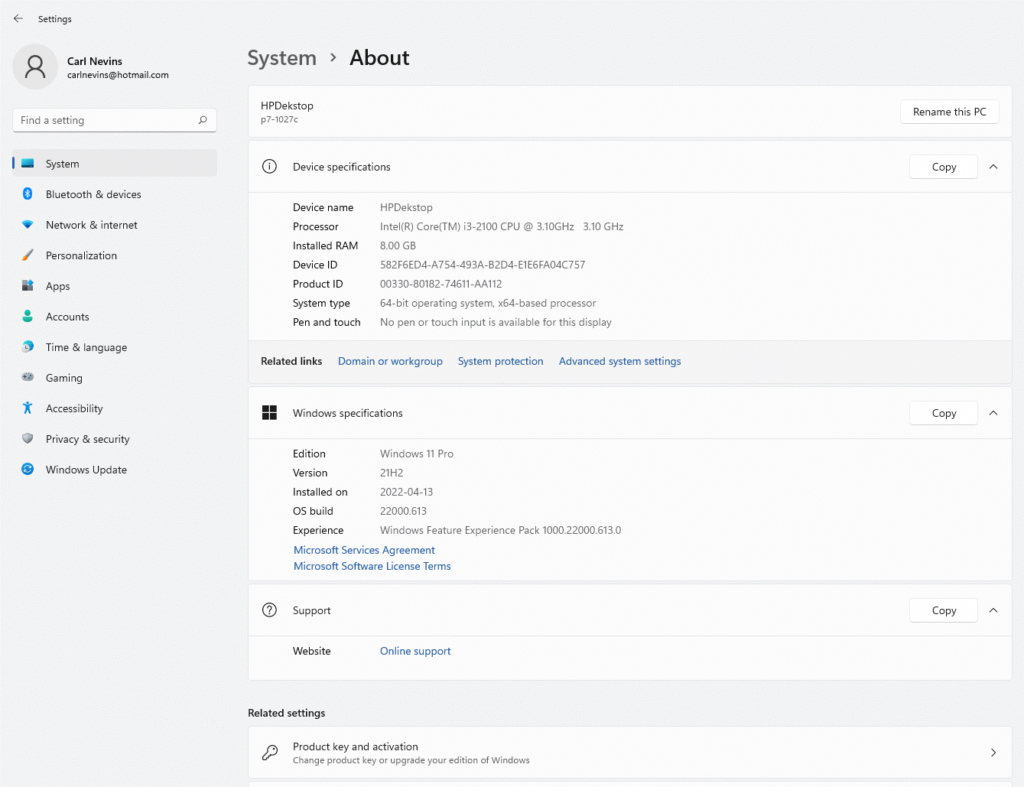
We’re using Windows 10. If we go into settings, we’ll go into system, scroll down to About, and as you can see, the system is Windows 10 Pro 21h2, which means that this is the most recent edition of Windows 10 that is currently installed on this system.
PC Health Check
First thing I did was run the PC Health Check. And here are the results.
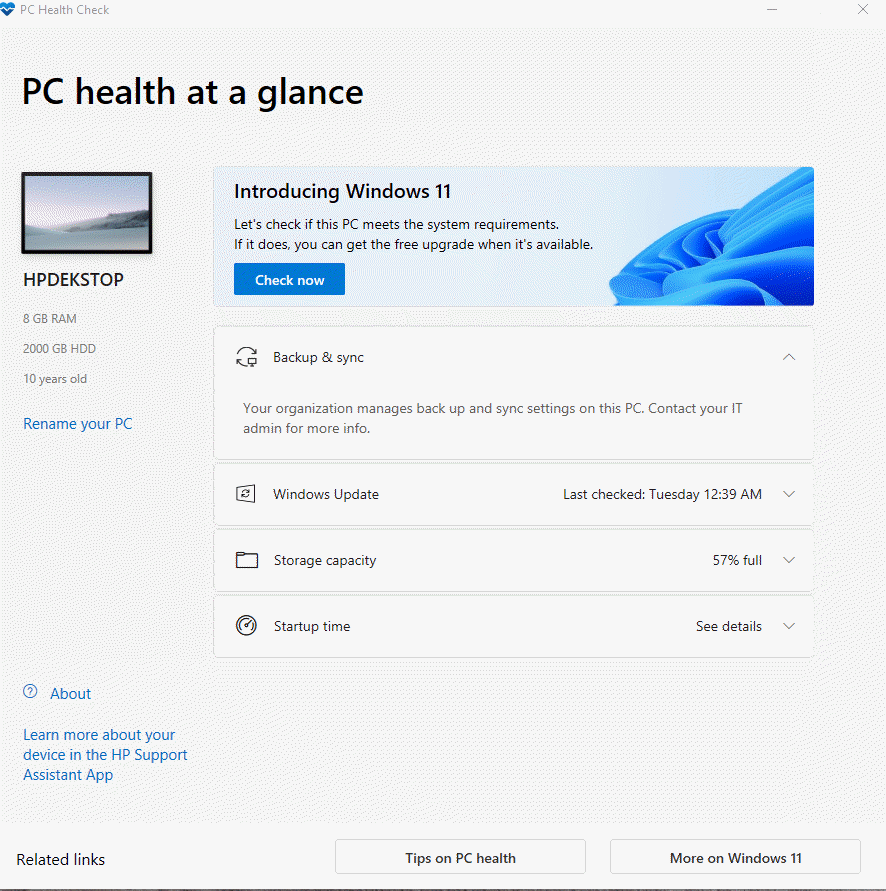

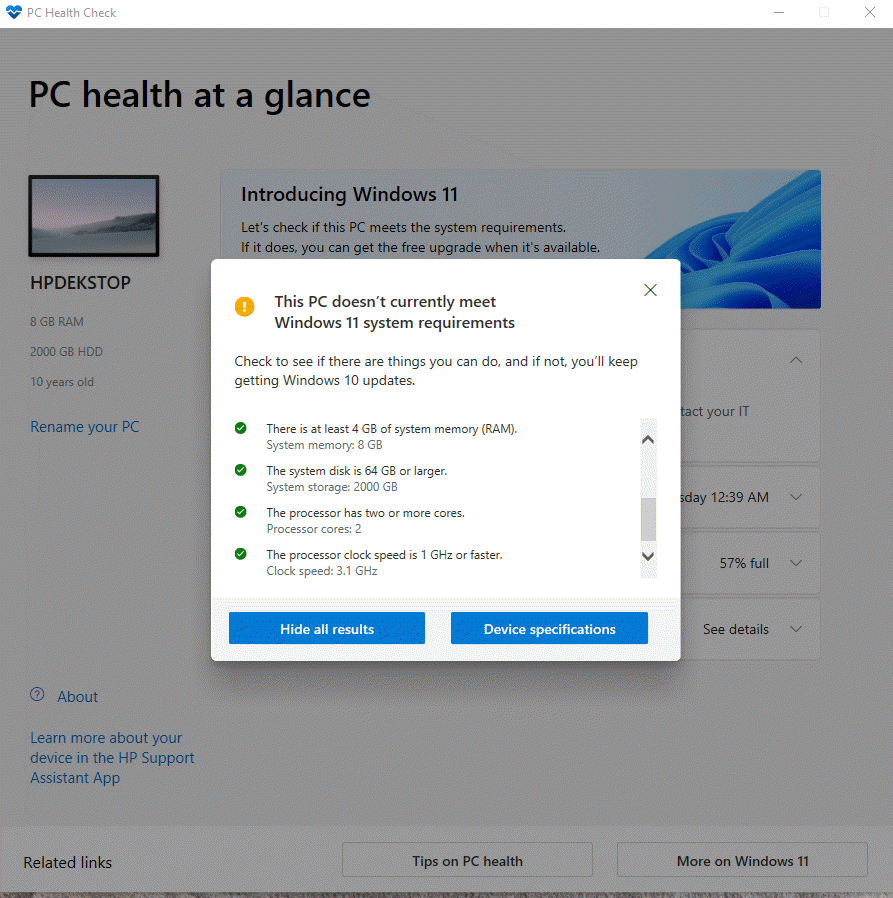
This is a 11-year-old processor that is so far removed from the list of supported processors that it’s not even funny. It presently doe not meet the system requirements of Windows 11. Secure boot is not supported. It lacks the TPM 2.0 module. Windows 11 does not presently support the CPU and probably never will..
What we need to do is convince Microsoft that this system does support Windows 11.
Force-Windows-11-Install
We’ll accomplish this by using a github project called Force-Windows-11-Install. This script, in essence, alters the Windows 11 installer.
We used to achieve this by taking the Windows 10 installer and simply inserting the Windows 11 Edition specific WIM from INSTALL.WIM into the Window 10 Installer. Unfortunately, I’ve had trouble getting that to produce a stable system once completed.
That is why I believe this method is far more dependable. This script simply modifies the existing Windows 11 installer to ignore the checks. Let me demonstrate how to accomplish it.
It’s actually quite simple. All you have to do to get it is go to github here. Go to the code section.
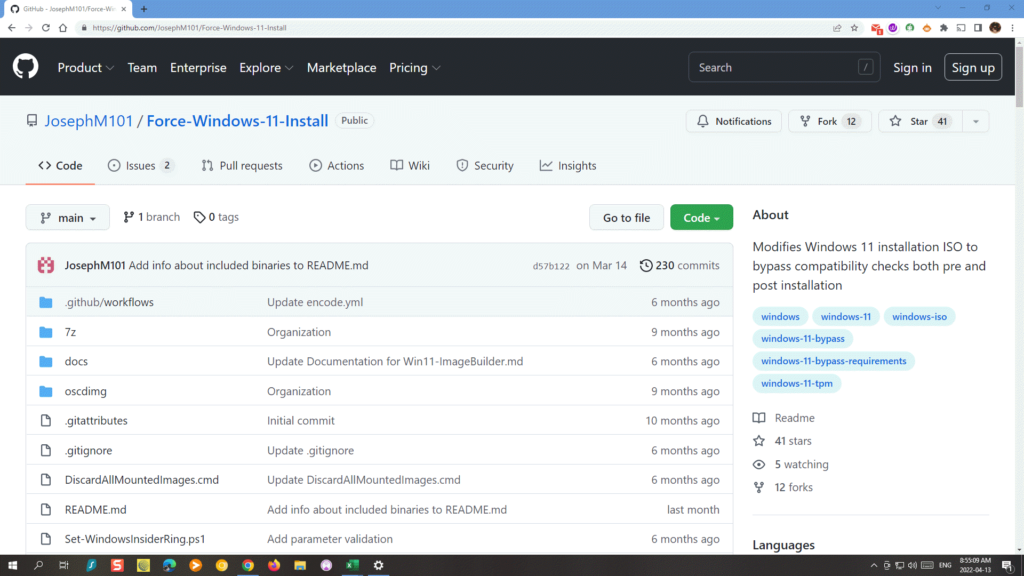
Click on Code and then hit download.

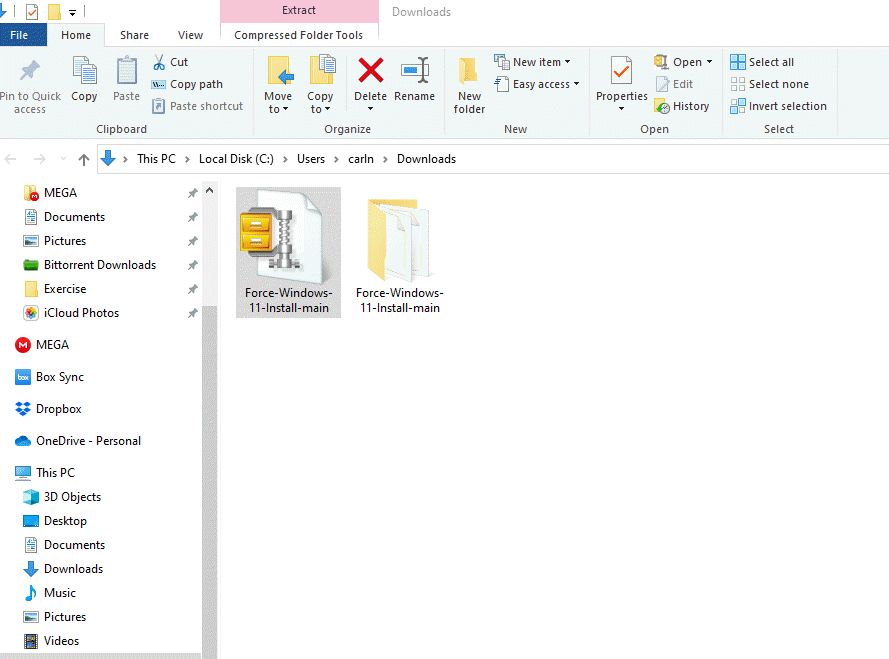
After it downloads, click on it to open it in file explorer.
Download the Media Creation Tool
Now that you have the script, the next thing you’ll need is a copy of Windows 11, which I would recommend downloading through Microsoft’s media creation tool. So, the next thing we want to do is open a new tab in Google and look for a media creation tool for Windows 11.
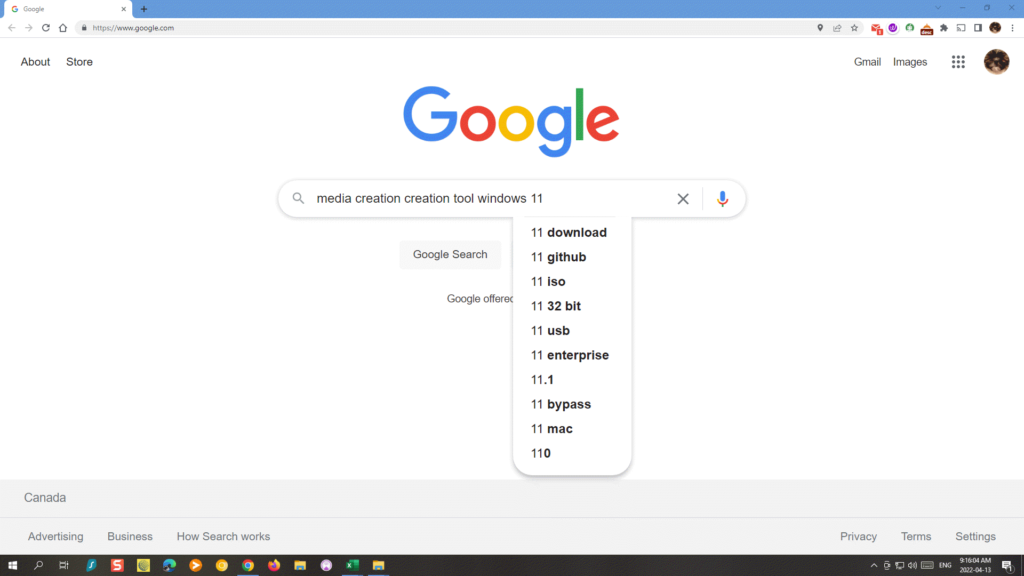
Then we simply click on the first link , scroll down, and click Create Windows 11 Installation media. Click Download.

So we’ll go ahead and accept, and it will take a few minutes. It appears that everything Microsoft does takes a minute.

Select language and edition

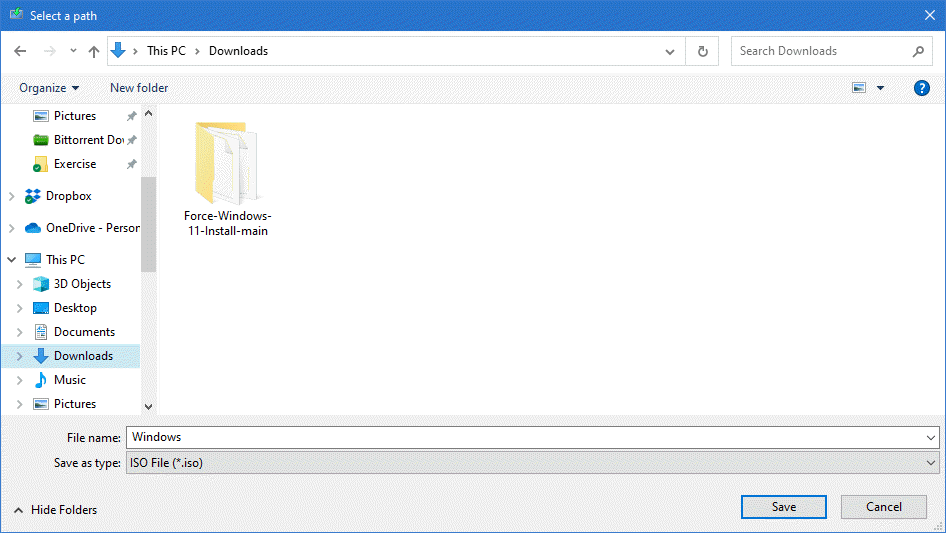
Make a USB flash device or an ISO file. Now we need an iso file for what we’re doing, so choose that and press the next button. Then, at this point, just save it.

If you only want Windows, you can use the default name. Go ahead and click save.
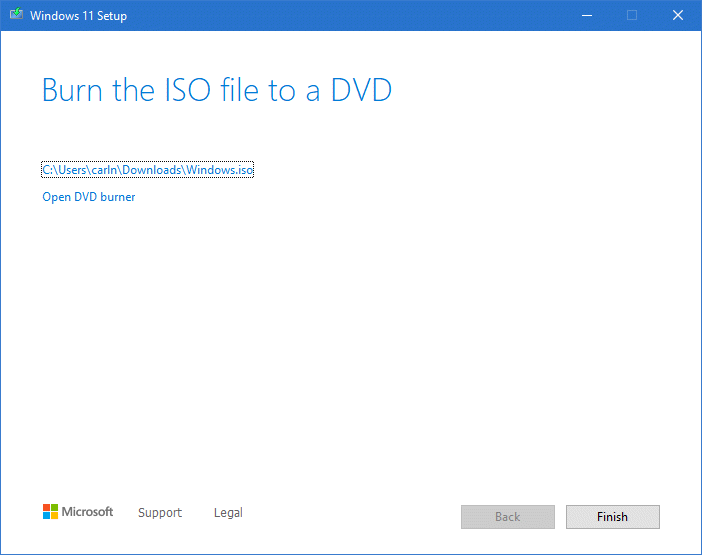
It will take a minute to download this ISO file.

So, once you’ve downloaded your ISO file just hit finish.
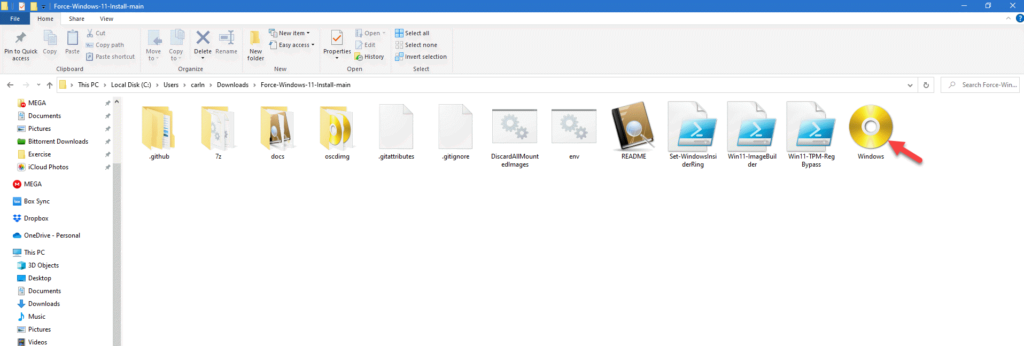
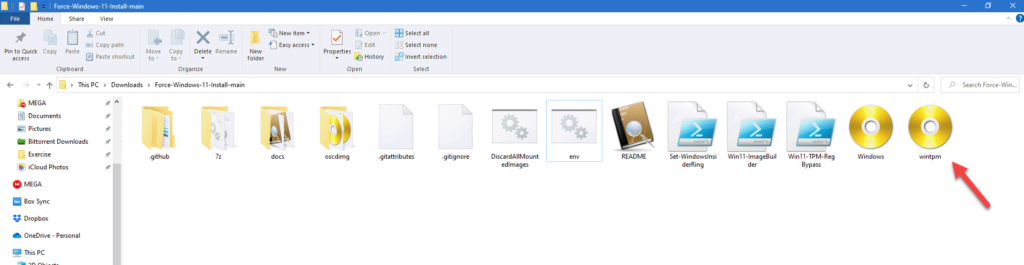
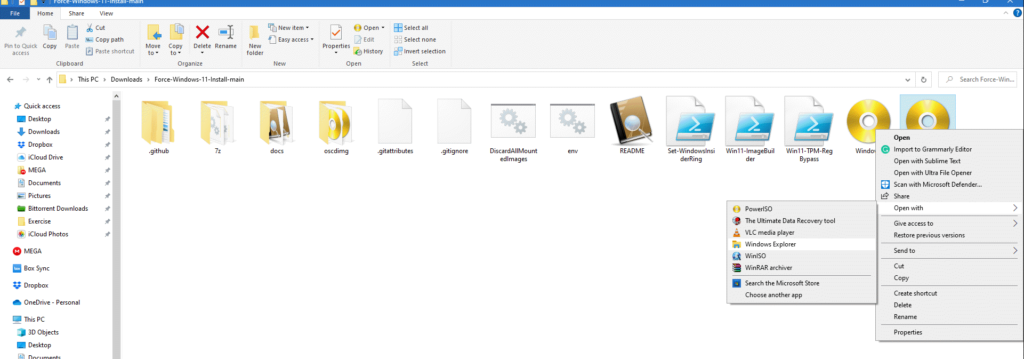
Here’s the ISO file that we just downloaded. What are we supposed to do with this ISO? We will just move it into the Force-Windows-11-Install folder.

When we open that folder, we can see that it contains the Windows iso as well as all of the files needed for the script.
Running the Script
The first thing we’ll want to do is run the script itself. There is a small batch file in the folder called env that makes things really simple. If you double-click on this, you’ll need administrator privileges.

Click on more info and just hit run anyway. This will open Windows PowerShell in the Directory that we need to be in.

What you have to do now is enable scripting in PowerShell. To do this we must run this specific command “Set-ExecutionPolicy -ExecutionPolicy Unrestricted” without the parentheses. Once it is entered in PowerShell hit Enter.

So after that, you hit enter, and it will ask you if this is what you want to do, so I’m going to go ahead and hit yes and then enter. This should enable PowerShell scripting.

So, once this is completed, go ahead and enter this command .\Win11-TPM-RegBypass.ps1 -source “windows.iso” -destination “wintpm.iso” as written, including the parentheses, and hit enter. It may take a little bit for the script to complete its task if you’re using an older system, which if you’re reading these instructions means you probably are, but please be patient.
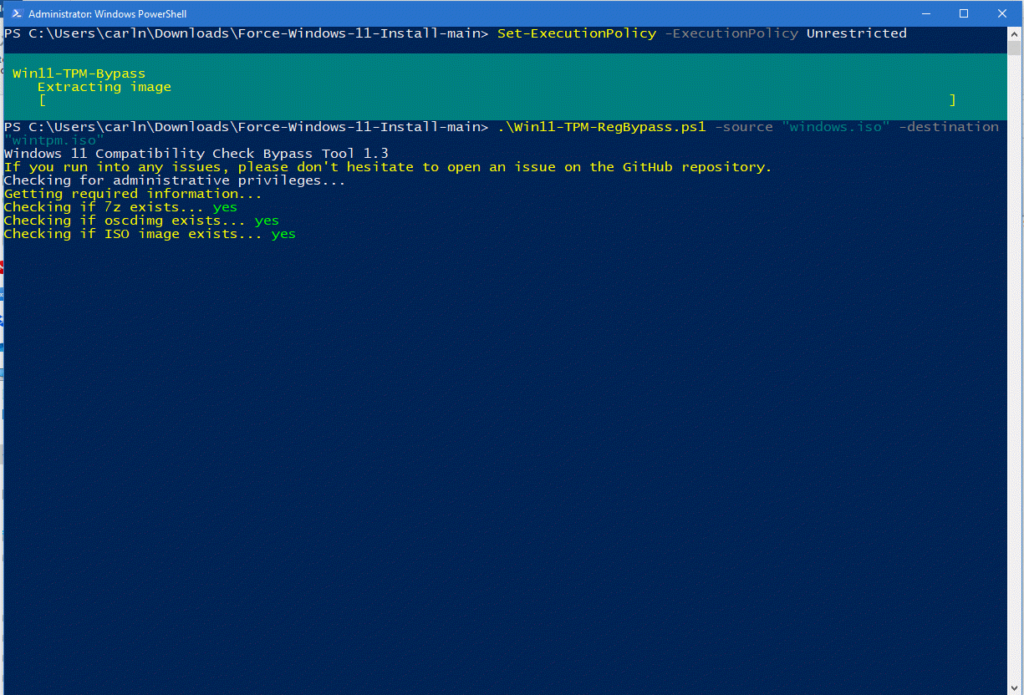
It will end at some point. When you get to this point and it says “operation completed successfully,” don’t close it or stop working yet, because it is still working in the background. You’ll see a command prompt appear, it’s actually writing the iso, so don’t close it.

Here’s the command prompt. It only takes a few minutes to create the ISO. We should be finished with the script once it’s completed.

We can go ahead and press enter to return to PowerShell.

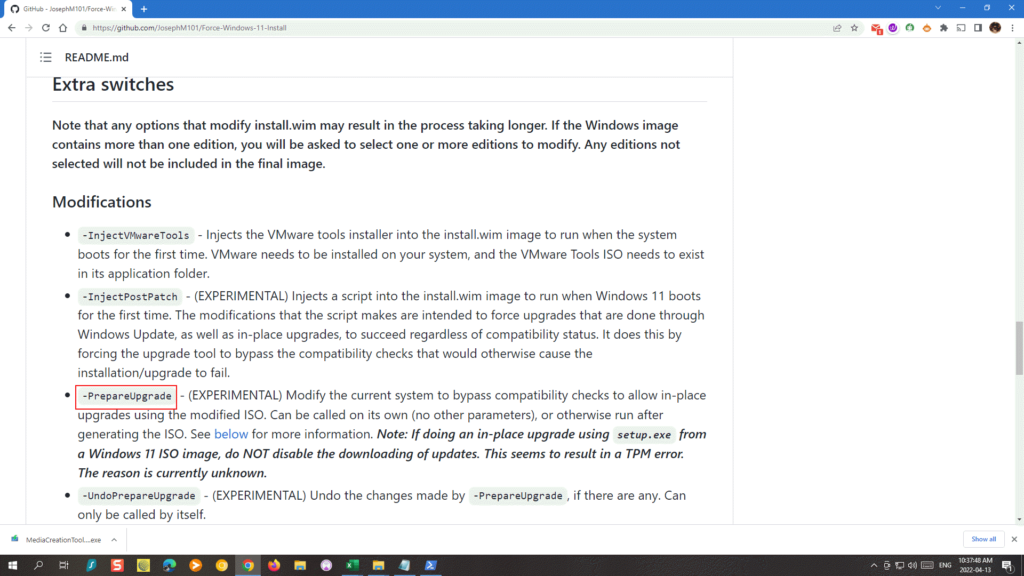
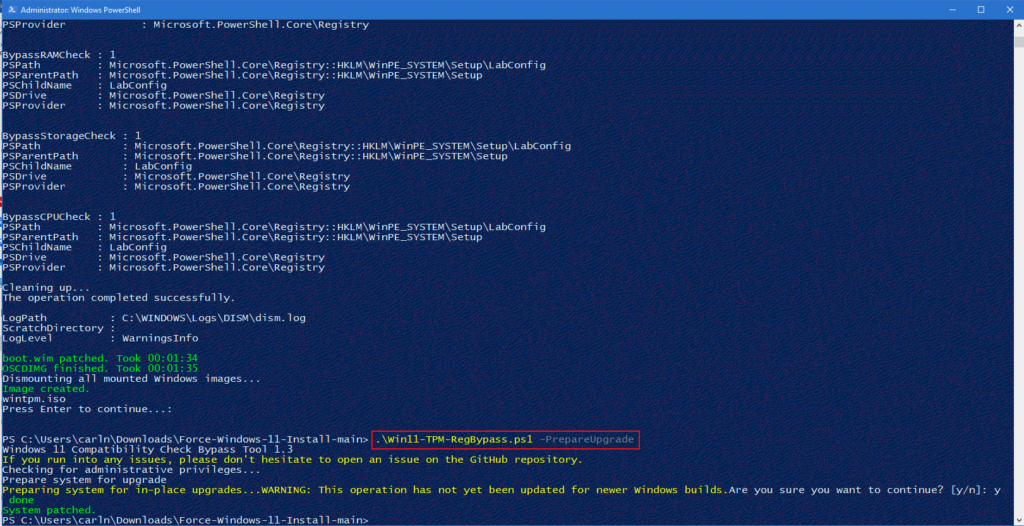
What we want to do now is return to github, where we first downloaded this script file, and scroll all the way down to where it says modifications. The modification we’re interested in is -prepareUpgrade. This will actually modify the existing system in order to bypass all the compatibility checks and such, so highlight this modification, right click, and copy.
At this point, what you want to do is go back to PowerShell and type in the command that you used previously with one important change. Paste the following command: .\Win11-TPM-RegBypass.ps1 -prepareUpgrade, once this is done hit enter. The system should now be patched. You can now close PowerShell.
Install Windows 11
In the folder where we downloaded the script and the Windows 11 iso we now have a new iso file. This is the iso that we will install.
We will now open the new iso with Windows Explorer.
Windows is now mounted to a virtual CD-ROM. Click on setup to start the installation.

Windows will now install normally. Hit Next.

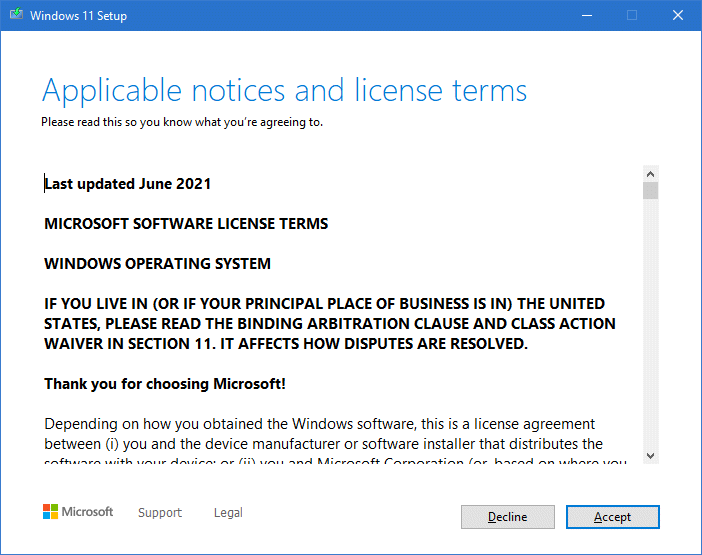
Accept terms and continue.
Windows is getting ready to install.
Hit install and windows 11 start the installation

Windows 11 is now installed on your unsupported PC.
However, we are not yet finished because there are a few adjustments that we need to do in order to make Windows 11 more stable once it has booted up. The first issue you’ll run into in Windows 11 on an unsupported system is that when you go down and click on security, the first thing you’ll want to do to repair Windows security is open up Windows terminal.
Buy, there is a chance that the Windows terminal is broken. This problem has a very simple solution. Here’s how you fix it.
Go to Microsoft Terminal on GitHub. Here is the link.
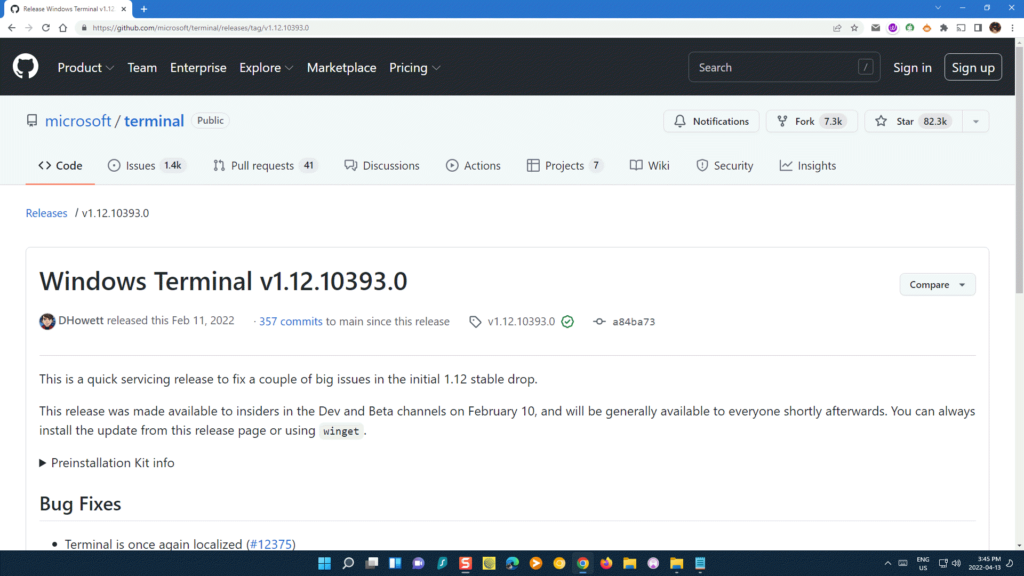
Scroll down to Microsoft.WindowsTerminal_1.12.10393.0_8wekyb3d8bbwe.msixbundle and download and install this file. Windows terminal will then be installed and your good to go.

Once it is installed we have to open it and run as administrator and run the following command get-AppxPackage Microsoft.SecHealthUI -AllUsers | Reset-AppxPackage. This command will install windows security. You should be able to open it up as you normally would, and everything should operate as it should.

In Conclusion
Is it a good idea to install Windows 11 on a computer that is not supported? If all you want to do is test out Windows 11 to determine what features you like and don’t like, then by all means, go ahead and install it. However, if this is a system that you frequently use and rely on, it may not be a good choice.
.