Introduction
Have you ever experienced that heart-sinking moment when your USB drive just won’t connect, or your phone refuses to charge? A malfunctioning USB port is more than just a minor annoyance; it can disrupt your work, kill your entertainment, and leave you feeling disconnected. If you’re struggling with a USB port that isn’t working, don’t panic. The good news is that you might be able to fix a broken USB port yourself, without needing to call in an expensive technician. In this guide, we’ll walk you through practical steps on how to fix a broken USB port that’s giving you trouble. Let’s troubleshoot and potentially repair your broken USB port, saving you time and money!
Why Is My USB Port Playing Hard to Get?
Before we dive into the repair USB port process, it’s important to understand why your USB port might be misbehaving. Think of it like a fussy toddler; understanding their needs will help you find the right solution! There are a few common culprits:
- Physical Damage: This is often the most obvious issue. Bending, twisting, or forceful insertion of a USB device can damage the delicate metal pins inside the port. A bent or broken port will not function correctly, and will require a USB port physical damage repair.
- Loose Connections: Over time, the solder joints connecting the USB port to the motherboard can become weak or even break. This causes the port to feel loose, and it might not make a solid electrical connection. This is especially common on frequently used ports. This is a common cause for a how to fix loose USB port on laptop query.
- Software Issues: Sometimes, the problem isn’t physical at all. Outdated drivers, operating system glitches, or incorrect USB settings can prevent devices from being recognized or charged. These software problems can manifest as a USB port not recognizing device problem.
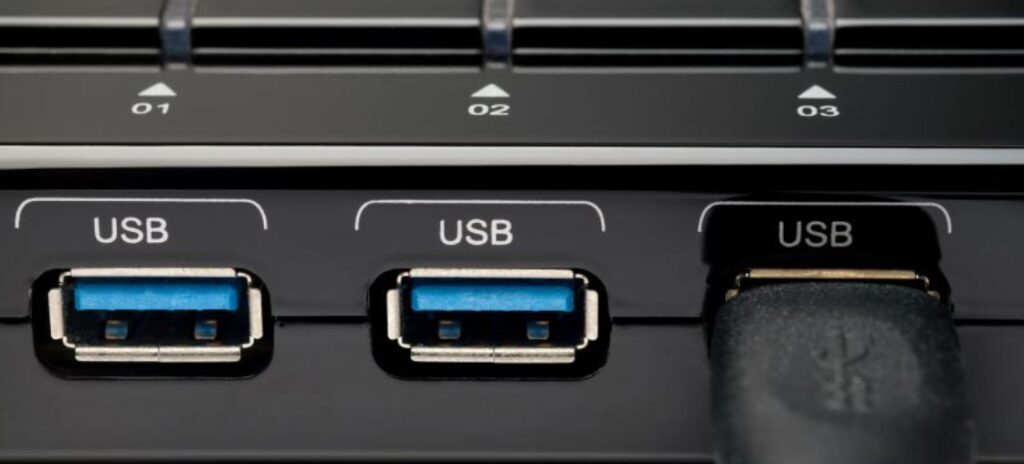
- Dust and Debris: Yes, something as small as dust bunnies can be the villain. Dust, lint, and other particles can accumulate inside the USB port, obstructing the electrical contact between the port and the USB device.
- Faulty USB Device: Sometimes, the issue isn’t your port; it’s the device you’re trying to connect. Always test with a different USB device first to rule out this possibility.
- Power Issues: Rarely, but possibly, your USB ports are not getting sufficient power from your power supply.
Signs of a Damaged USB Port: How to Spot the Trouble
Before you start trying to repair USB port, it is crucial to identify the symptoms. Knowing signs of damaged USB port will make troubleshooting much more effective. Let’s look at the red flags:
- Intermittent Connection: A device connects and disconnects repeatedly. It’s like the device and your computer are having a bad game of hot-and-cold.
- Device Not Recognized: Your device is plugged in, but nothing happens. Your computer pretends it isn’t there at all, completely ignoring it.
- Loose or Wobbly Port: The USB port feels loose or moves more than it should when you plug in a device. It feels like it’s about to fall out.
- Visible Damage: Bent pins or a physically damaged port are the most obvious indicators. This damage is often visible to the naked eye.
- Device Not Charging: If the issue is with a charging device, it could be a power delivery issue. Even when correctly connected, your phone or other devices might fail to charge via USB.
- Error Messages: Your computer displays error messages related to the USB port or connected device. Error messages like “USB device not recognized” are common.
- Slow Transfer Speed: You can still connect, but transfers are noticeably slower, indicating a potential connection issue.
How To Fix A Broken USB Port: A Step-by-Step Guide
Okay, let’s get to the heart of the matter: how to fix USB port issues. Depending on the cause of the problem, different methods of repair apply. Let’s look at some solutions you can try at home. Remember, patience and caution are key!
1. The Easy Fixes: When the Problem Isn’t Too Serious
Sometimes, the solution is simpler than we think. Start with these basic troubleshooting steps before you dive into more complex methods:
- Restart Your Device: This may seem too simple, but rebooting your computer, laptop, or phone can often resolve temporary software glitches causing your issue. It can be a surprising way to fix USB port not recognizing device problems.
- Try a Different USB Device: Make sure the problem isn’t the USB device you’re using. Try using another USB device. Try another USB port if you have one. This will help you identify whether the issue is with the USB port or the device itself.
- Dust It Off: Use compressed air to blow out any dust or debris from the port. You can also gently use a soft brush or toothpick to dislodge any dirt. This can often resolve connectivity issues caused by blockages.
- Update Your Drivers: Outdated USB drivers can cause compatibility issues. Go to your device manager (on Windows) or system information (on Mac) and look for the USB controller. Right-click and choose to update the driver. This can help to fix USB port not working repair.
- Check Your USB Settings: Ensure that USB devices are enabled in your device settings. In Windows, go to Device Manager, find “Universal Serial Bus controllers,” right-click on each controller and ensure it is enabled.
2. Addressing Physical Damage: A More Delicate Approach
When USB port physical damage repair is required, more care is needed. However, you can still try the following methods at home, but if you are not sure how to do it, consult a professional:
- The Gentle Bend (For Minor Damage): If you notice any bent pins inside the USB port, you can try to carefully straighten them with a precision tool like a needle, thin tweezers, or a toothpick. However, be extremely gentle, as they are very fragile. This can be a risky solution and could result in more damage. Take extra care. It’s not always possible to do without soldering, and you can try USB port repair without soldering at your own risk.
- Cautionary Note: If the damage is severe, attempt no further action. It could lead to short circuits or permanent damage to your device. It’s often better to admit defeat and consult a professional for a thorough and safe repair.
3. Fixing a Loose USB Port: When Connections Aren’t Stable
A loose USB port can be incredibly frustrating. Here are some steps to address this issue. This is often the reason that people search for “how to fix loose USB port on laptop“.
- The Paper Fix (Temporary Solution): This is a quick and dirty temporary solution. Cut a small piece of paper and place it on the top of the USB port to create a tighter fit between the male USB device and the port. However, this does not fix the physical issue with the port. If you are uncomfortable, don’t attempt this.
- Soldering (Advanced, If Needed): If the solder joints connecting the USB port to the motherboard are broken, you can re-solder them. This is an advanced repair that requires soldering experience and equipment. If you aren’t confident in your skills, seek a professional repair for the laptop USB port repair at home
- Replace the Port (Professional Repair): If neither of the above options works, the best solution may be replacing the entire USB port. This requires special tools and technical expertise. It’s best left to a professional and can be costly. This is the method used when you want to replace USB port laptop
4. Software Solutions for USB Port Problems
Sometimes, the problem lies with the operating system or drivers. Here are some software-related fixes:
- Driver Reinstallation: Uninstall the USB driver from device manager and restart your computer. Windows will then automatically reinstall the driver.
- Operating System Updates: Ensure you have the latest updates installed for your operating system. This helps eliminate any system bugs causing the USB port issue.
- USB Selective Suspend: In Windows, go to Control Panel > Hardware and Sound > Power Options. Check your power plan settings and disable USB selective suspend. This can help with intermittent USB connection problems.
- Roll Back Drivers: If the problem started after a recent driver update, you can roll back the driver to a previous version through the device manager.
When to Seek Professional Help: Understanding Computer USB Port Repair Cost
While many USB port issues can be addressed with DIY methods, it’s important to recognize when professional help is needed. If you are not confident in any of these methods, a professional is the best option. Here’s when to seek an expert:
- Severe Physical Damage: If the USB port is significantly damaged or broken, attempting a DIY repair could cause further damage. It is best to seek a professional for your USB port physical damage repair.
- Soldering Required: If the connections to the motherboard are broken, and you are not skilled in soldering, seek professional repair.
- Complex Issues: If you’ve tried all the troubleshooting steps, but nothing has worked, it’s time to consult an expert.
- Lack of Confidence: If you are unsure, seek out professional help. It is better to take this option than risk damage to your device.
The computer USB port repair cost can vary widely depending on the extent of the damage, the type of device, and the repair service you choose. It could range from $30 to over $150. For laptop USB port repair near me, look at local computer repair shops and compare prices. A professional repair may cost more, but it will get you the best results.
Preventative Measures: Keeping Your USB Ports Happy
Prevention is always better than cure. Here are some steps to prevent future USB port problems:
- Handle with Care: Be gentle when inserting or removing USB devices. Avoid forceful or sudden movements.
- Avoid Dust Accumulation: Regularly clean your USB ports with compressed air to prevent build-up of debris.
- Use Protective Caps: Consider using USB port dust plugs when not in use. These are inexpensive and can help prevent dust accumulation.
- Consider a USB Hub: Use a USB hub or docking station to avoid wear and tear on your laptop’s USB ports. It adds more ports and prevents excessive use of your original ports.
- Don’t Force Connections: If a USB device doesn’t seem to be going in, stop and check the connection. Don’t try to force it. This may indicate that there is a problem.
- Check the Port: Check your USB port from time to time. This can help you identify physical damage at an early stage.
Conclusion: Empowering You to Fix Your USB Port
USB ports are essential for our day-to-day digital life, and a broken one can be an unnecessary stress. By following this guide, you should now have a deeper understanding of how to fix USB port issues. Whether it’s a simple software glitch or a more involved physical repair, don’t panic! You now have the knowledge to troubleshoot and take appropriate action. If DIY isn’t your thing, you now know when to seek help from a professional. Remember to treat your USB ports with care and use the preventative measures to reduce the risk of damage. With these tips in hand, you’ll be back to connecting your devices in no time!
Hopefully, this information will help you fix your USB port and also give you some better understanding.
Call to Action:
Have you experienced a similar problem? Share your experiences in the comments below. If you found this guide helpful, share it with friends and family so that others can benefit from this knowledge. Remember to subscribe to our blog for more tech tips and troubleshooting advice.