Do you want to reset your entire network but are unsure how to do so? In this post, you will be shown how to fix network problems with this function offered by Windows. Are you experiencing network difficulties in Windows 10 that you can’t seem to resolve? There are a variety of reasons why this can occur, but if you’re having serious difficulties, the quickest solution is to perform a full Windows 10 network reset on your computer.
Windows 10 offers a function that allows you to restore your network to the state it was in when Windows was initially installed. While you should always consider other alternatives first, such as running Windows network diagnostics, network reset is a good backup option.
Windows will forget your Ethernet and Wi-Fi networks when you reset your network. Additional connections, such as VPN connections or virtual switches, will also be forgotten. Resetting will disable and then reinstall all your network adapters and other networking components back to their original settings.
Having said that, here’s how to execute a network reset in Windows 10. It’s quite simple.
Reset Windows 10 Network using Settings
Open Windows Settings by right clicking on Start (1) and (2) clicking the Settings button

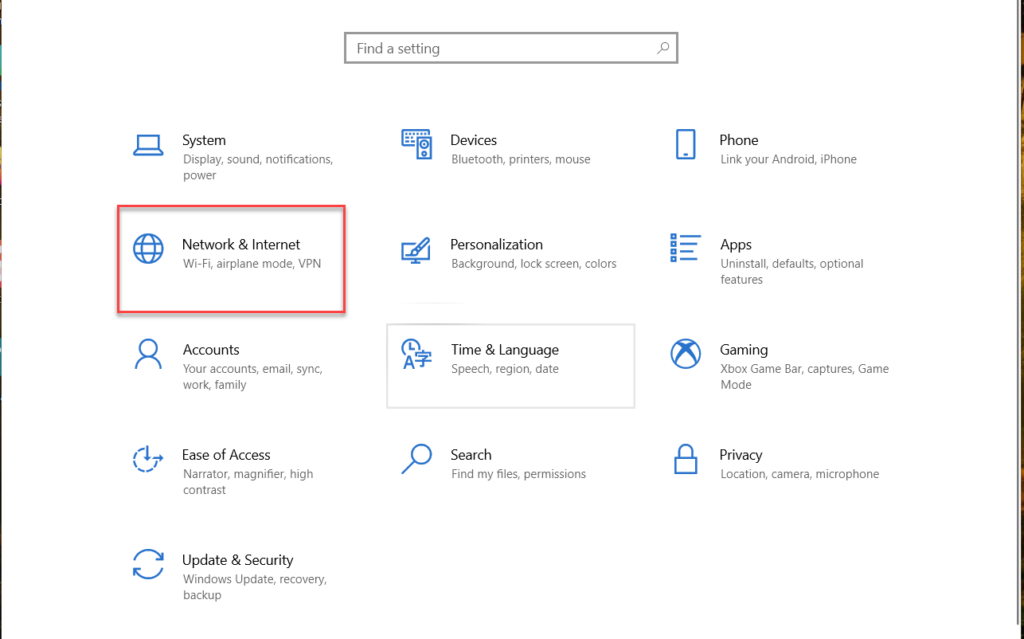
On the Windows Settings screen, click “Network & Internet.”

Select the “Status” tab on the left of the “Network & Internet” page, then scroll down and click the “Network reset” link on the right.

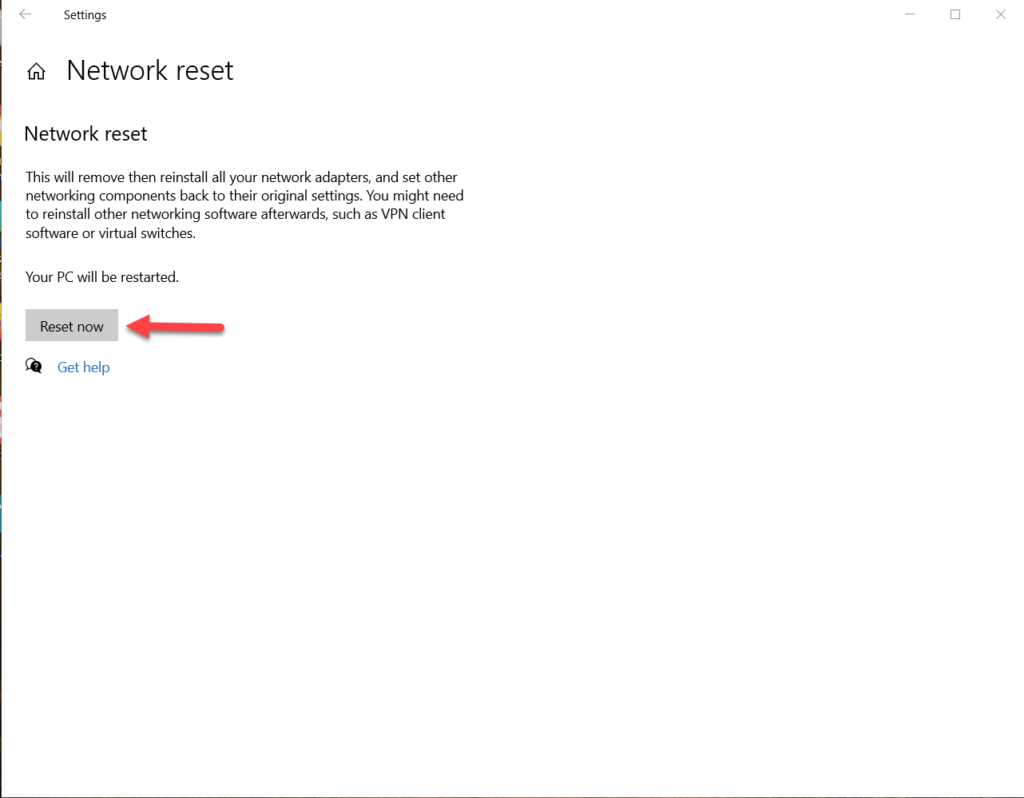
The “Network reset” box informs you of the consequences of resetting your network and also indicates the need for a restart. To reset the network and restart your computer, click the “Reset now” option.

When prompted to confirm the network reset, select “Yes.”

That’s everything there is to it. After restarting your computer, Windows will guide you through the process of configuring your network.

